
Photo to Cross Stitch Pattern, Step by Step
To turn a photo into a cross stitch pattern, crop the photo close to its subject, choose a width in stitches and a number of thread colours, then print the chart and its colour key. Crop the photo in your phone's photo app first; our free cross stitch pattern maker does the rest in your browser, and your photo never leaves your device.
Below, one picture goes through the tool at different settings, and then a real photograph does. Every chart and number on this page is real output from Photostitch, not a mock-up.
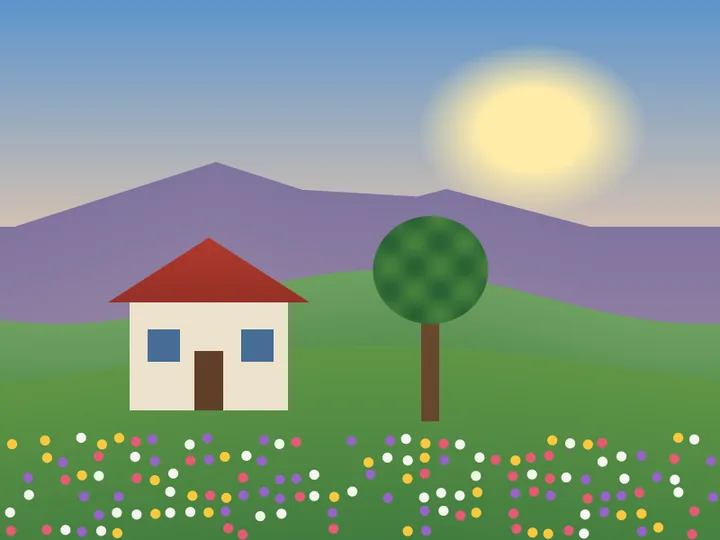
What makes a photo chart well?
A photo charts well when the subject fills the frame, the background is plain and the main shapes differ clearly in colour or brightness. Detail smaller than one stitch disappears, so crop before you start.
- Crop close to the face, pet or building you care about.
- Choose even light. Hard shadows split one colour into several threads.
- Avoid busy backgrounds. They turn into scattered single stitches.
Our sample illustration charts well because the cottage, tree and sun are large, flat shapes. The flower meadow is the hard part, as the numbers below show.
A real photo: crop close, then chart
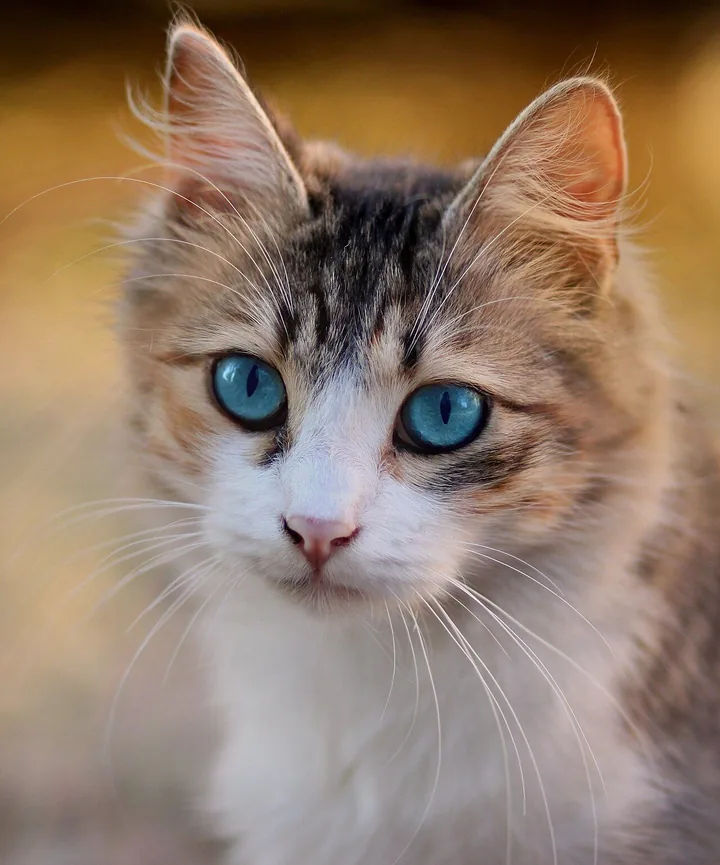
Photos are harder than illustrations, because fur, whiskers and soft backgrounds blend into each other. Here is a real photograph of a cat, charted at the same 80 stitches wide and 20 colours as the sample.
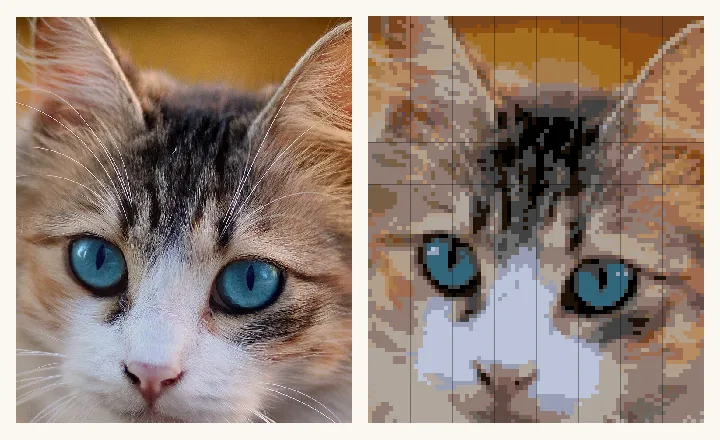
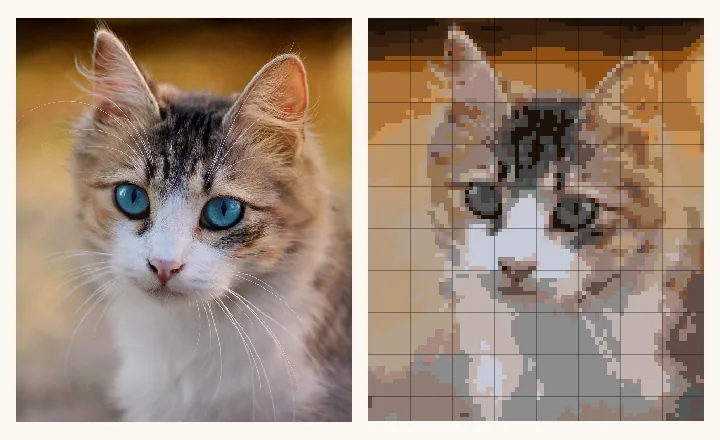
Cropping to 768 of the 1280 pixels across means each stitch covers 9.6 pixels of the photo instead of 16.0. The face gets about 67% more stitches in each direction.
Detail has a cost: the cropped chart has 321 confetti stitches against 164 for the whole photo, mostly in the fur. Confetti is explained in step 2.
Step 1: how wide should the pattern be?
For a first photo, an 80-stitch width is a good start: about 5.7 inches on 14-count Aida, with enough stitches to keep windows and edges recognisable. Aida 14 means 14 stitches per inch, so the finished width is the stitch count divided by 14.
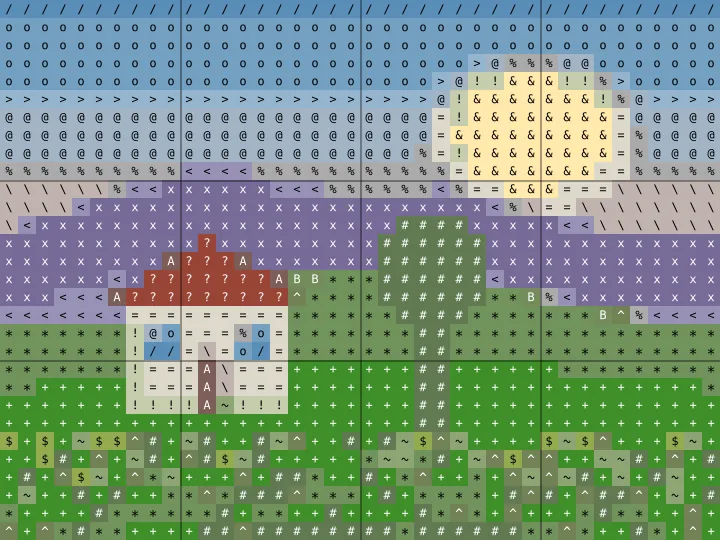
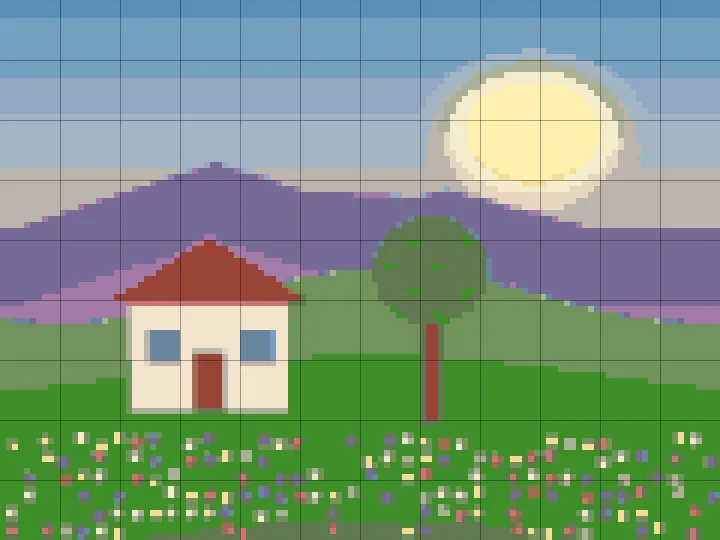
| Width | Grid | Stitches | Size on 14-count | Colours used under 50 times | Skeins |
|---|---|---|---|---|---|
| 40 | 40 x 30 | 1,200 | 2.9 x 2.1 in | 14 of 20 | 20 |
| 80 | 80 x 60 | 4,800 | 5.7 x 4.3 in | 5 of 20 | 20 |
| 120 | 120 x 90 | 10,800 | 8.6 x 6.4 in | 0 of 20 | 21 |
At 40 stitches, 14 of the 20 colours are used fewer than 50 times. You would buy 20 skeins for a design that barely touches most of them.
At 120 stitches every colour earns its place, but you stitch 10,800 crosses instead of 4,800. On 16 and 18-count fabric the same 80 stitches come out at 5.0 and 4.4 inches wide; the cross stitch size chart has every count.
Step 2: how many colours should you use?
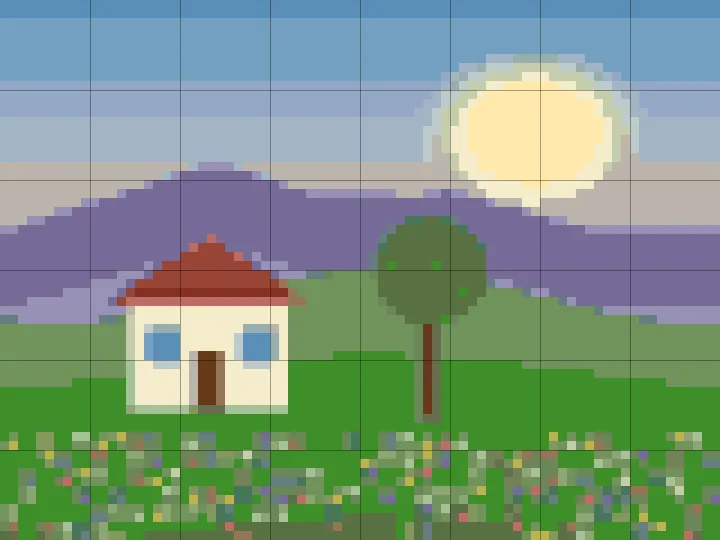
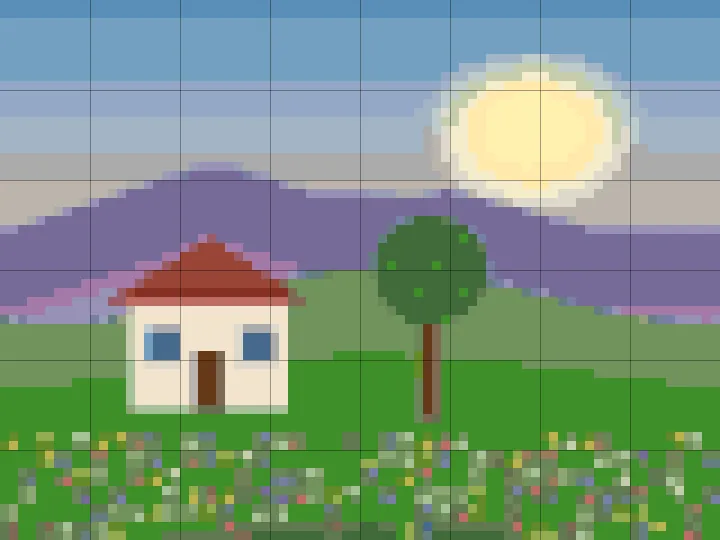
On this photo, 20 colours kept every shape and the soft glow of the sun. Going to 40 mostly added single stitches you would hardly see, plus 20 more skeins to buy.
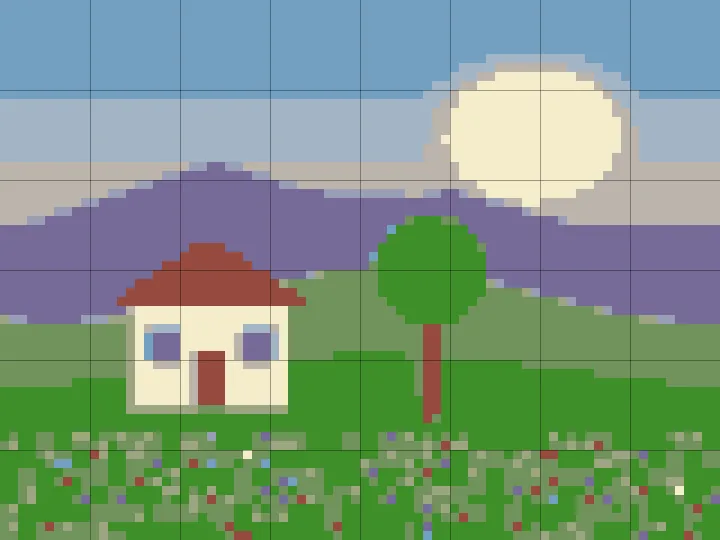
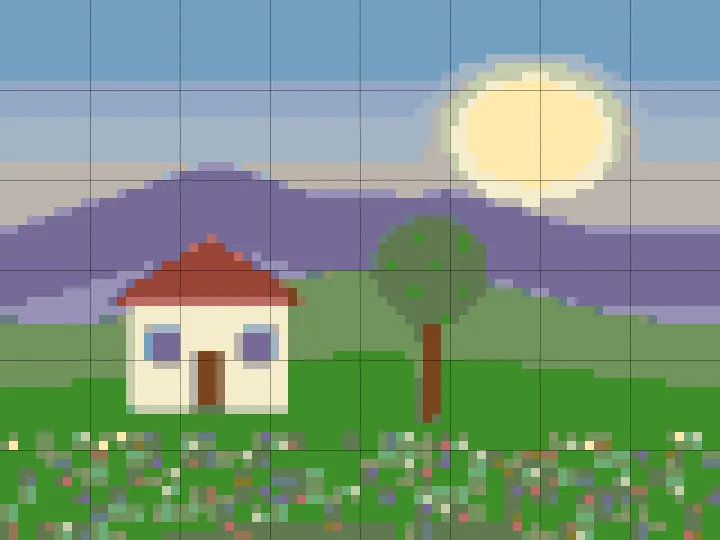
| Colours asked for | Colours in the key | Confetti stitches | Colours used under 50 times | Skeins |
|---|---|---|---|---|
| 10 | 10 | 106 | 1 | 10 |
| 20 | 20 | 172 | 5 | 20 |
| 30 | 29 | 216 | 13 | 29 |
| 40 | 40 | 254 | 20 | 40 |
Confetti stitches are single stitches with no neighbour of the same colour. Each one means starting and ending a thread, so they are slow to stitch. We counted them on each chart, checking all eight neighbours.
From 10 to 40 colours, confetti rose from 106 to 254, and the colours used fewer than 50 times rose from 1 to 20. Asking for 30 gave 29, because two shades matched the same thread and the tool merged them.
A simple rule: start near 20, then look at the key. If many threads have only a handful of stitches, turn the colours down; how many colours a cross stitch pattern needs compares a photo, an illustration and a flat drawing.
Step 3: how do you read the chart and colour key?
Each square on the chart is one cross stitch, and its symbol tells you which thread to use. A bolder line every 10 stitches helps you count your place, and the key matches each symbol to a thread number.
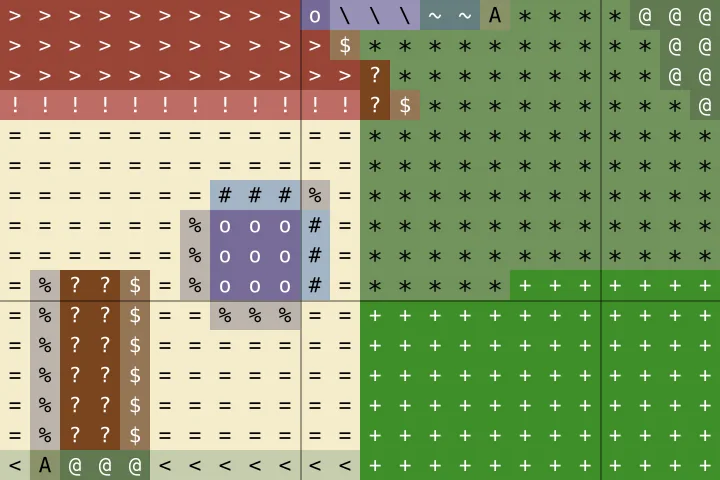
In this close-up, > is the roof (DMC 355), = is the cottage wall (DMC 677), o is the window (DMC 3746) and ? is the door (DMC 433).
The full colour key for this chart
| Symbol | Thread number | Colour name | Stitches | Skeins |
|---|---|---|---|---|
| + | DMC 701 | Green Light | 856 | 1 |
| x | DMC 334 | Baby Blue Medium | 676 | 1 |
| o | DMC 3746 | Blue Violet Dark | 637 | 1 |
| * | DMC 3347 | Yellow Green Medium | 566 | 1 |
| # | DMC 932 | Antique Blue Light | 339 | 1 |
| @ | DMC 367 | Pistachio Green Dark | 324 | 1 |
| % | DMC 648 | Beaver Gray Light | 312 | 1 |
| & | DMC 809 | Delft Blue | 228 | 1 |
| = | DMC 677 | Old Gold Very Light | 184 | 1 |
| / | DMC 745 | Yellow Pale Light | 144 | 1 |
| \ | DMC 155 | Blue Violet Medium Dark | 128 | 1 |
| < | DMC 524 | Fern Green Very Light | 93 | 1 |
| > | DMC 355 | Terra Cotta Dark | 67 | 1 |
| ^ | DMC 913 | Nile Green Medium | 58 | 1 |
| ~ | DMC 3768 | Gray Green Dark | 51 | 1 |
| ? | DMC 433 | Brown Medium | 35 | 1 |
| ! | DMC 3722 | Shell Pink Medium | 31 | 1 |
| $ | DMC 611 | Drab Brown | 30 | 1 |
| A | DMC 3052 | Green Gray Medium | 29 | 1 |
| B | DMC 730 | Olive Green Very Dark | 12 | 1 |
Every thread here needs one skein. The tool estimates about 1,800 full stitches per skein on 14-count, so even the main green, at 856 stitches, fits in one. Buy each colour in one go, because dye lots can differ slightly.
How the tool picks thread colours
It averages the photo under each stitch, groups similar colours, and matches each group to the nearest thread using CIEDE2000, a standard formula for how different two colours look. Grouping a picture into a few colours like this is called colour quantization.
Step 4: how do you print it and start stitching?
Download the PDF chart, print it at full size, and start from the centre so the design sits in the middle of your fabric. The PDF marks the centre with small triangles on the edges of the grid.
- The 80 x 60 chart prints as a cover page, two chart pages (columns 1 to 50 and 51 to 80) and one key page.
- Cut your fabric about 3 inches bigger than the design on every side: about 11.7 x 10.3 inches for this chart on 14-count.
- Fold the fabric in half both ways to find its centre, and start your first stitch there.
Photo: Tabby cat with blue eyes by AdinaVoicu, released under the CC0 1.0 Universal Public Domain Dedication. We cropped it and charted it with Photostitch.

Chart your own photo